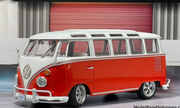
Volkswagen Type 2 Delivery Van
"Egg Girls Happy Halloween"
Hasegawa | No. 52373 | 1:24
Чињенице
- Бренд:
- Hasegawa
- Наслов:
- Volkswagen Type 2 Delivery Van "Egg Girls Happy Halloween"
- Број:
- 52373 (Такође је наведена као SP573)
- Размера:
- 1:24
- Тип:
- Целовита макета
- Издато:
- 2023 Нови декали/налепнице
- Бар код:
- 4967834523739 (EAN)
- Паковање:
- Чврста кутија (са поклопцем)
- Тематика:
- Volkswagen T1 (1950–1967) » Аутомобили (Возила)
Садржај кутије
Величине:
290x190x82 mm
(11.4x7.5x3.2 inch)
Тежина:
318 g (0.7 lbs)
Бокарт дизајнирао Takashi Fujisawa
Временски оквир производа
Hasegawa
Revell
Marks & Spencer
1997
1998
1999
199x
2000
2001
2008
2009
200x
2010
2011
2013
2015
2016
2017
2019
2020
2021
2022
2023
2024
Упутства
Немамо тачна упутства, али их имамо за:
Преузимање 4630Kb (.pdf)
Тржиште
No partner shops available
In-box рецензије
Екстерне рецензије
Није нам позната ни једна In-box рецензија за ово Volkswagen Type 2 Delivery Van (#52373) од Hasegawa.
Коментари
Ron Garcia
Super easy build. Finished it because Halloween was coming up. I only have a few recommendations for the very few members on this forum that might build this kit.
1) Decals 18 and 19 go over the headlight parts N1. I built mine that way but could never get the decals to look exactly the way I wanted them to. Parts N1 are slightly oval while the decal "eyes" are round. So, you'll end up with part of the decals on the two parts. It looks fine that way, but there is no real way to nudge them to look perfectly circular. You could try and apply the decals before adding parts N1, but because the parts are slightly oval, the decals may look a bit out of proportion. Perhaps the best method would be to paint both N1 parts black and then add a thin black stripe above and below by masking or using decal film. Of course, the white outline of the headlamps would be missing, but the whole kit design is fictional, so would that even matter?
2) Leave the front bumper loose to make decal 21 easier to apply.
3) The directions don't say this, but I saw a promo picture with the rear window tinted red. I did the same and it gives the paint job more character since there are a couple of decals that are applied to it.
4) Originally, I wasn't going to paint the white trim along the top of the vehicle. I didn't think it would be worth the masking hassle. I did it anyway, and I'm glad I did. It breaks up the otherwise solid purple upper portion of the kit. Masking it isn't as bad as it looks if you use some flexible tape like the kind Tamiya sells.
The best thing about the kit is that my wife actually liked one of my models! She doesn't much care for my usual grey aircraft or green tanks no matter how unique they are. Sitting on my shelf next to those kits, it really catches the eye. Highly recommended for a nice diversion from the same 'ol, same 'ol.
2 20 October 2024, 23:19
Steven Van Dyck
Thanks for the tips, this is sitting in my stash and will probably awaken this or next year.
21 October 2024, 06:40
Ron Garcia
Glad you found them useful! If it wasn't for the paint job, you'd have it finished in a day. Happy modeling!
23 October 2024, 00:30
Галерија
Сви чланци » (22 укупно)
Референтни материјал
Све књиге » (4 укупно)