F/A-18A+/B/CF-188
Kinetic | No. K48030 | 1:48

Fatos
- Marca:
- Kinetic
- Título:
- F/A-18A+/B/CF-188
- Número:
- K48030
- Escala:
- 1:48 O
- Tipo:
- Kit completo
- Lançado:
- 2016 Peças novas
- Código de barras:
- 9588838161038 (EAN)
- Embalagem:
- Caixa rígida (abertura pelo topo)
- Tópico:
- McDonnell Douglas F-18 Hornet » Jatos (Aeronave)
- Listed on:
Marcações
McDonnell Douglas F-18 Hornet
McDonnell Douglas CF-188A Hornet
 Royal Canadian Air Force - Aviation royale canadienne (2011-now)
- 409 Sqn. Nighthawk 188794 794
Junho 2006
FS36375 FS35237 - 409 Sqn. Nighthawk 188747 (Capt Darren Blakie 'Baja')
Junho 2016
FS36375 FS35237 - 410 Sqn. Cougars 188757 (Maj Lewis 'Singe')
Junho 2016
FS36375 FS35237 - 410 Sqn. Cougars 188793 (Capt Hannam 'Tyson')
Junho 2016
FS36375 FS35237 - 425 Sqn. Alouette 188756
2015
FS36375 FS35237 - 425 Sqn. Alouette 188788
2015
FS36375 FS35237 - 425 Sqn. Alouette 188797
2015
FS36375 FS35237
McDonnell Douglas CF-188B Hornet
 Royal Canadian Air Force - Aviation royale canadienne (2011-now)
- 410 Sqn. Cougars 188916 (Capt Myers 'Sloth')
Junho 2016
FS36375 FS35237 - 410 Sqn. Cougars 188932 (Capt Park 'Trailer')
Junho 2016
FS36375 FS35237 - 410 Sqn. Cougars 188937 (Capt Guibat 'Whaler')
Junho 2016
FS36375 FS35237 - 410 Sqn. Cougars 188938 (Capt Walker 'Shrek')
Junho 2016
FS36375 FS35237 - 425 Sqn. Alouette 188917
2015
FS36375 FS35237
McDonnell Douglas EF-18AM Hornet
 Ejército del Aire (Spanish Air Force 1939-now)
McDonnell Douglas F/A-18A Hornet
 Royal Australian Air Force (1921-now)
- No. 3 Sqn. A21-57
2015 Operation OKRA - Persian Gulf
FS36375 FS35237 - No. 75 Sqn. A21-35
Abril 2015 Australian International Airshow - Avalon, VIC
FS36375 FS35237 - No. 77 Sqn. A21-4
2014
FS36375 FS35237
McDonnell Douglas F/A-18A+ Hornet
 Ejército del Aire (Spanish Air Force 1939-now)
- Ala 46 46-13 / C.15-85
2016
FS36375
Conteúdo
Árvore de plástico (Clear), Árvore de plástico, Fotogravado, Decalque (dágua)
Dimensões:
470x300x84 mm
(18.5x11.8x3.3 inch)
Peso:
828 g (1.83 lbs)
Boxart desenhado por Vincenzo Auletta
Linha do tempo do produto
Kinetic
Instruções
Download 6925Kb (.pdf)
Mercado
No partner shops available
Avaliações
Revisões externas
Todos os comentários » (10 no total)
Revistas
Todas as revistas » (9 no total)
Comentários
Second build of this kit. I still had trouble with the refueling probe section. Not as bad this time. It just sits funny in the cockpit half. I won't make another, but if I did, I'd add part H6 after I constructed the forward fuselage so I could make adjustments to make it sit more flush in the closed position.
I didn't have as much trouble with the cockpit shroud the second time around either. I think the issue the first time was caused by the engineering of the upper fuselage itself. Because of the cut out for the aerial refueling probe, the starboard side doesn't have much plastic attaching to the rest of the fuselage. The plastic that is there is the lip where the cockpit shroud sits. I accidentally broke that the first time so it could have rode high after I repaired it. As it was, I nearly broke it again due to the finicky fit due to - you guessed it - the aerial refueling subassembly. The forward canopy still rode high and required sanding to blend it into the forward cockpit section.
29 March 2022, 00:08
Having finished several Hasegawa F-18s, I was interested how this kit would measure up. I thought it was easier to build than Hasegawa's. The flaps and ailerons are easier to install by far. Overall the fit was the parts was great - except for two things that caused me a serious headache!
The first was the aerial refueling probe. Just two pieces if you want it closed like I chose, three if not. The subassembly is added to the nose section, but the instructions aren't very clear how to do this. I figured it out but it sat too deep in the front cockpit. I played with it over and over and even reattached it several times but I was never able to get it to fit flush with the nose section. I ended up puttying it over and rescribed the panel outline. I don't know what I did wrong but I spent WAY too much time on a two piece subassembly.
The second major problem I had was with the cockpit shroud C25 of all things. There are three notches for it to fit into the top fuselage section so I placed it exactly where it was supposed to go. However, when I tried to add the forward canopy, the shroud interfered with it. The shroud sits too high so it forces the front canopy up a few mm instead of a smooth tradition into the fuselage. Again, I played with it over and over, but I couldn't get it to sit correctly. I ended up having to carefully carve the excess clear plastic in the front portion of the forward canopy where the canopy frame is and then add putty to the front of the fuselage to make a smooth transition. Again, I'm can't figure out what happened.
Aside from those two major problems, I liked the kit. I have a second one I'm going to put together next. That will let me see if those issues were bad luck, the kit or user error. I reserve judgement until I build the next one.
1 3 March 2022, 02:49
Projetos
1 imagens
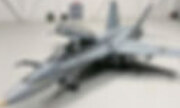
Cold Lake Cougar: 1/48th Kinetic CF-188A/B (F/A-18A/B) Hornet
1:48
See completed model at: https://www.flypastrush.com/post/cold-lake-cougar-1-48th-kinetic-cf-188b-hornet
Projeto: F/A-18A+/B/CF-188
All projects » (16 no total)
Galeria
Todos os artigos » (14 no total)
Material de referência

McDonnell Douglas F/A-18 Hornet F/A-18A/A+/B/C/D/ATARS & International Versions
Real to Replica Red Series No. 8
Andy Evans
2024 Todos os livros » (68 no total) Todos os <em>walkarounds</em> » (45 no total)
 banco de dados de modelagem de trens | gerenciador de estoque


