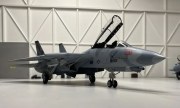
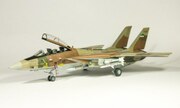
我们并没有任何关于此套件的开盒测评 F-14D Tomcat (#51970) 从 Hasegawa.
Ron GarciaThis is my 11th (and final!) Hasegawa F-14 (and 9th in a row) that I've built. I'm not a big fan of the F-14, I just bought them as they came out forever ago until I came to my senses. This one was the exception in that I thought it looked cool when it was released many years ago.
Having built a bunch of Hasegawa's first release F-14s, building this kit was interesting. They modified the intakes and gave a more logical build sequence in the instructions. Everything fit pretty well for once except for, strangely, the rear seat. It just sat up too high and interfered with the canopy. I had to cut it down several millimeters on the bottom to get the canopy to fit flush with the fuselage. Weird.
Of course, the kit's main draw are the decals. I've had hit or miss luck with Hasegawa's decals. I almost always have to spray a gloss coating from a spray can or they crumble and crack when I apply them. In once case, a test decal just disintegrated after I barely touched it. Perhaps it's because they had been in my stash so long or because they are super thin. Not so with these decals.
The decals are thick and generally sturdy. Almost all went on without much trouble. The only major issue I encountered was with the large decal of the girl on the top of the fuselage. In the kit there are two long strips that are part of girl's image. They are supposed to go over the horizontal fences so that when the main decal is put in place the image of the girl is uninterrupted. Because the decals were so stiff, I decided to put them on first by just laying them on top of the fences and then placing the main decal over them (there are cutouts where the fences are) hoping that I could use weight of the large decal to help snuggle the two long ones into place.
Forget it. The thin strips just wouldn't bend enough. Then, as I was messing around with placing the large decal, it snapped into several pieces. I carefully removed the two thin strips and put the main decal back together like a jigsaw puzzle. My advice, don't even bother with the those two thin decals and live with the purple fences. They don't detract from the image at all.
Another issue with the decals is that you really have to apply the white borders on the leading edges and the interior decals by trial and error. Ideally, the interior stripes should just touch the white borders. However, because they are all in several pieces, you have to work fast so you can adjust the decals as necessary. I suggest working on one surface at a time.
Really, it would be better to just paint the white borders. But because of the uncertainty of how the decals fit and some of the white decals having designs on them, that would be difficult. In the end, I had paint all the leading edges white anyway since the decals don't fold over the edges.
One saving grace is that the decal sheet has a ton of cherry blossom(?) decals. So, if you mess up here or there, you can just use one to hide your mistake. I did that in several places.
None of this should seem like this is a complaint about the kit. If you buy this model, then you know what you're getting into. When completed, it does look great. It really sticks out on my shelf. My wife proclaimed it her favorite F-14 because it was "girly". I like it because it is very unusual. Definitely worth building if you want something other than another grey aircraft on your shelf.
1 1 August 2021, 04:39